Please start using the service in your destination country within 180 days after receiving the activation completion email.
*Menu options on your device may vary depending on the model and OS version.
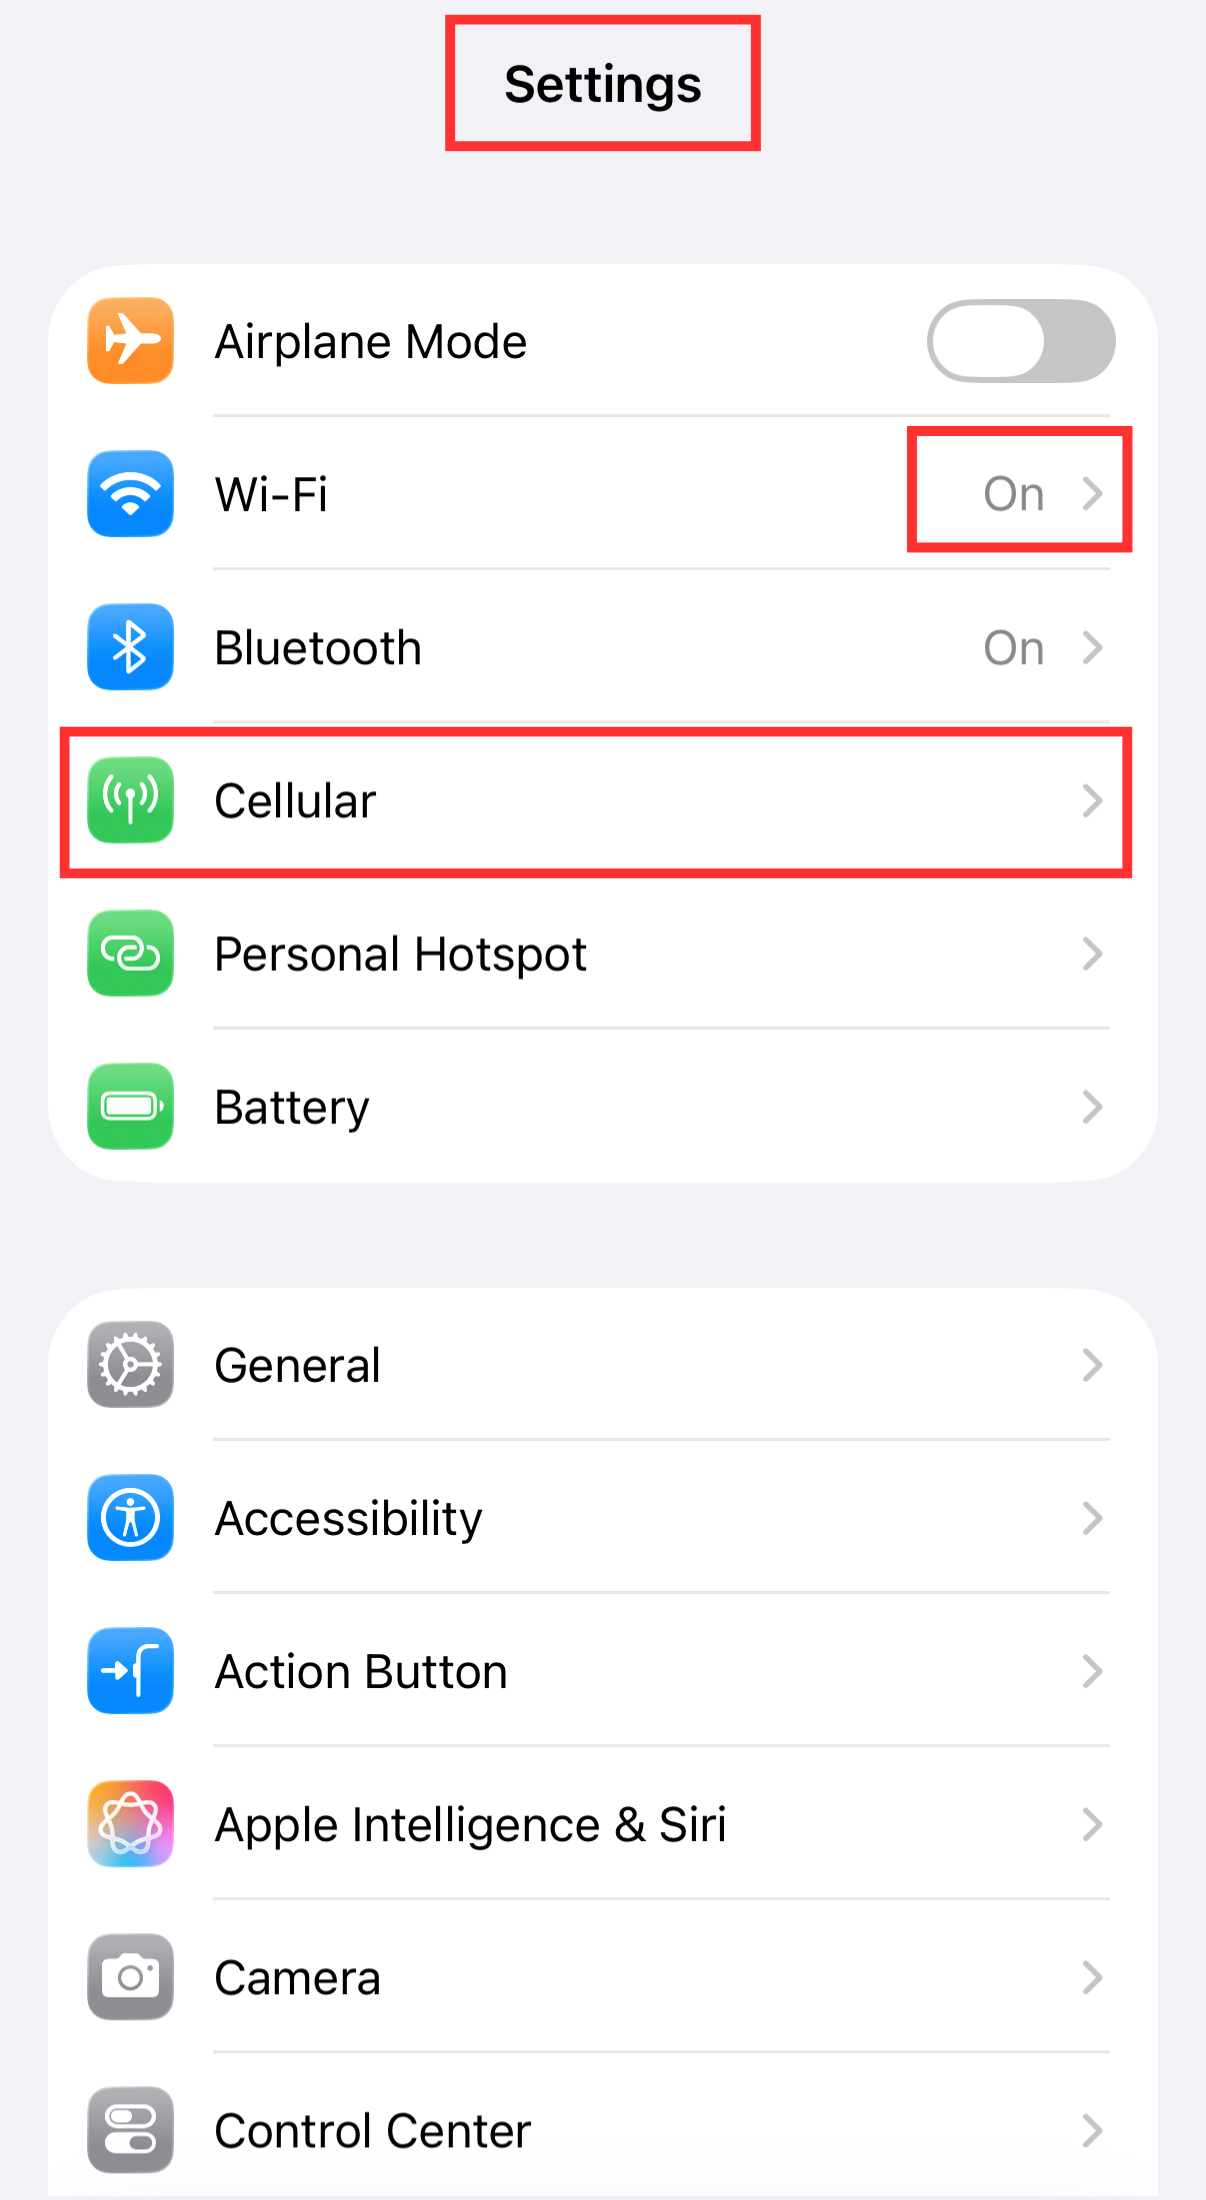
1. Connect to Wi-Fi, then go to [Settings] > [Cellular]
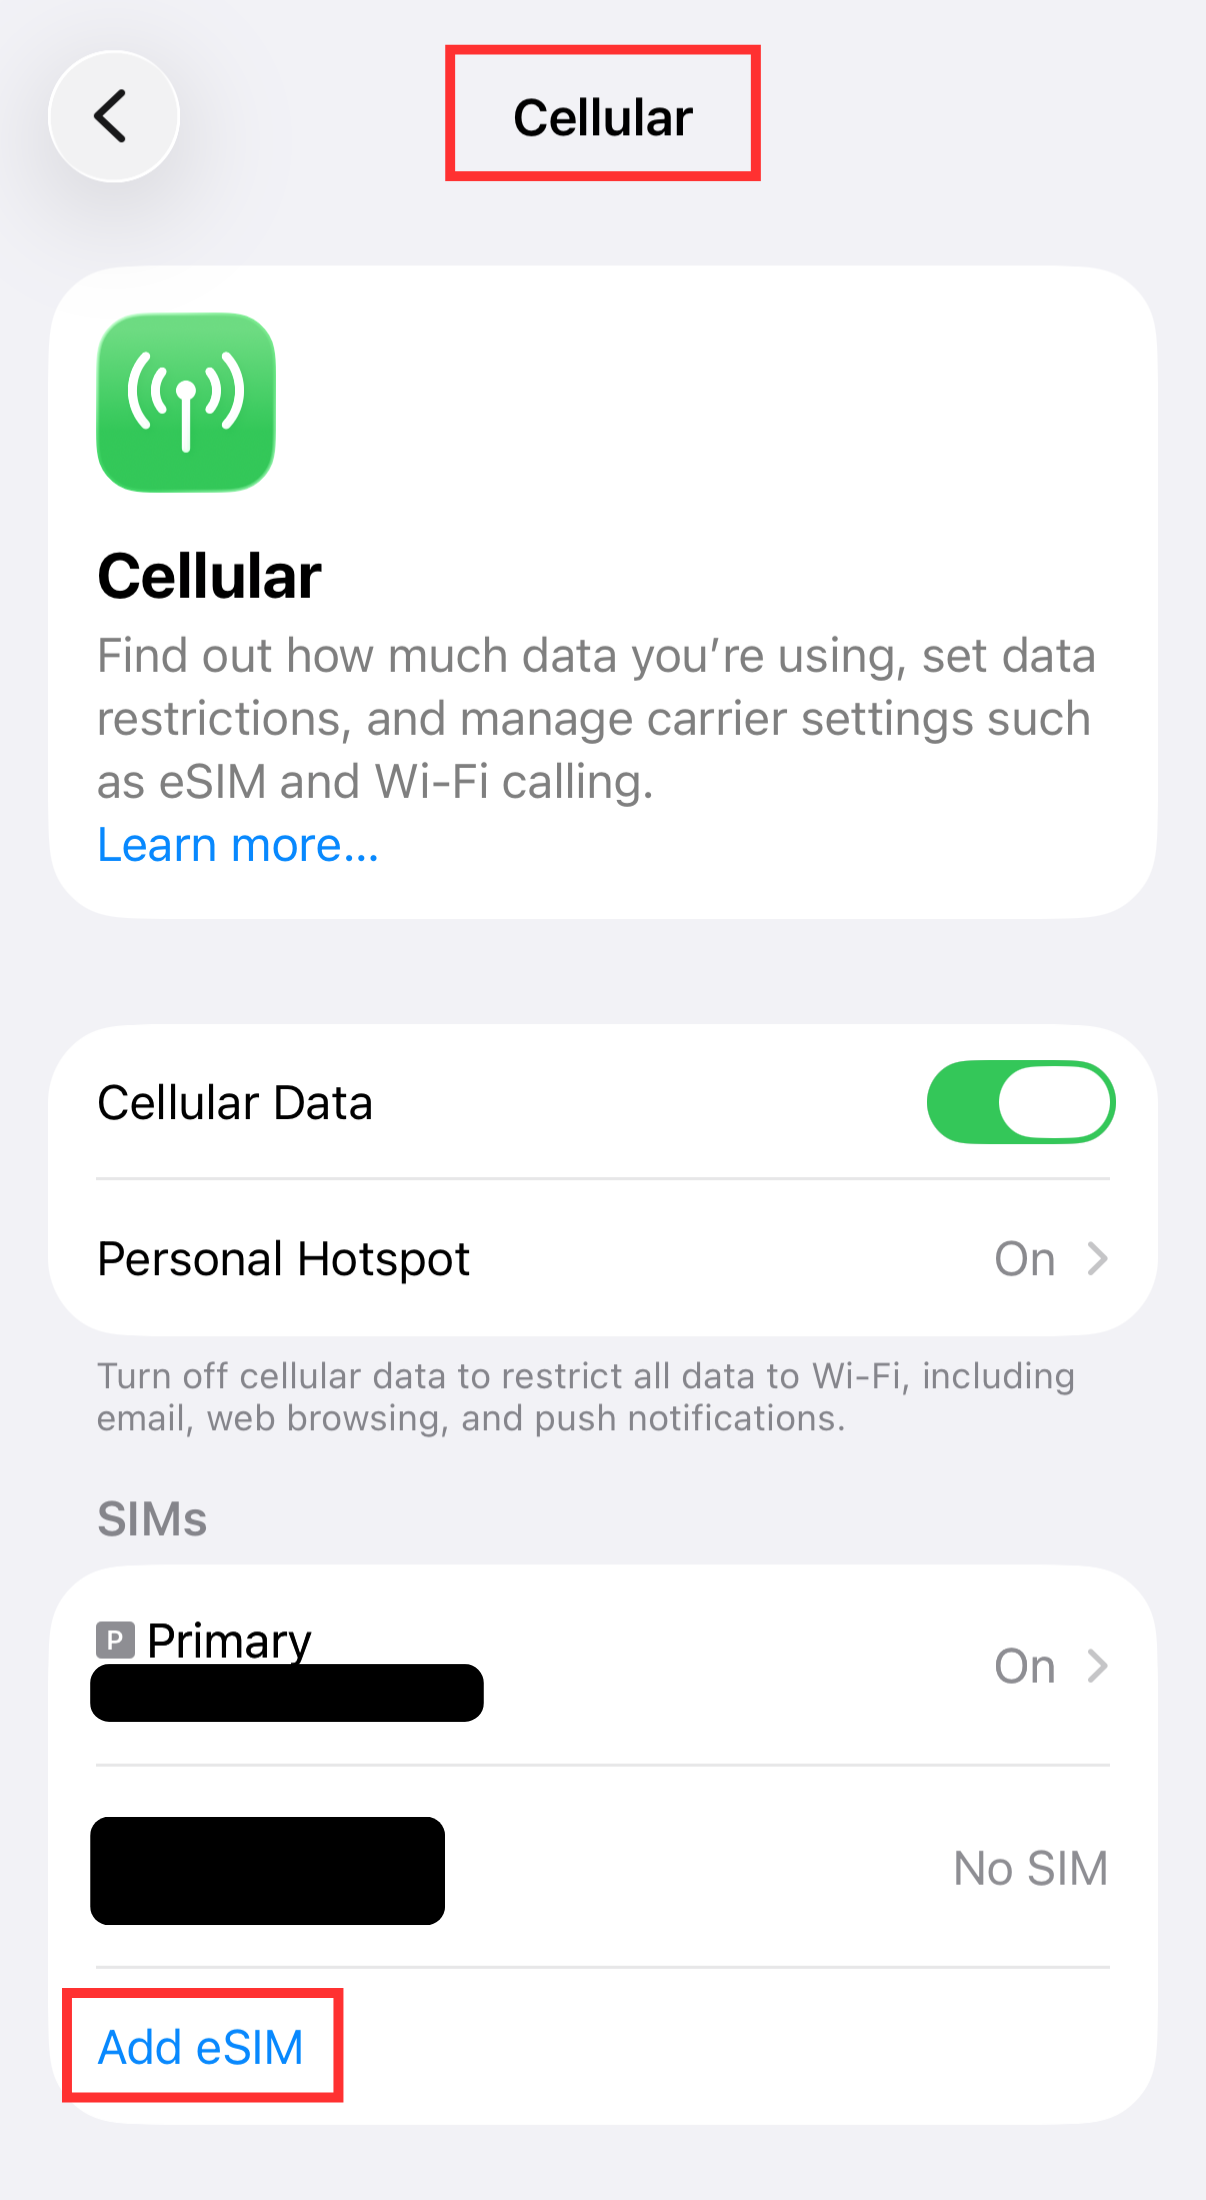
2. Tap [Add eSIM]
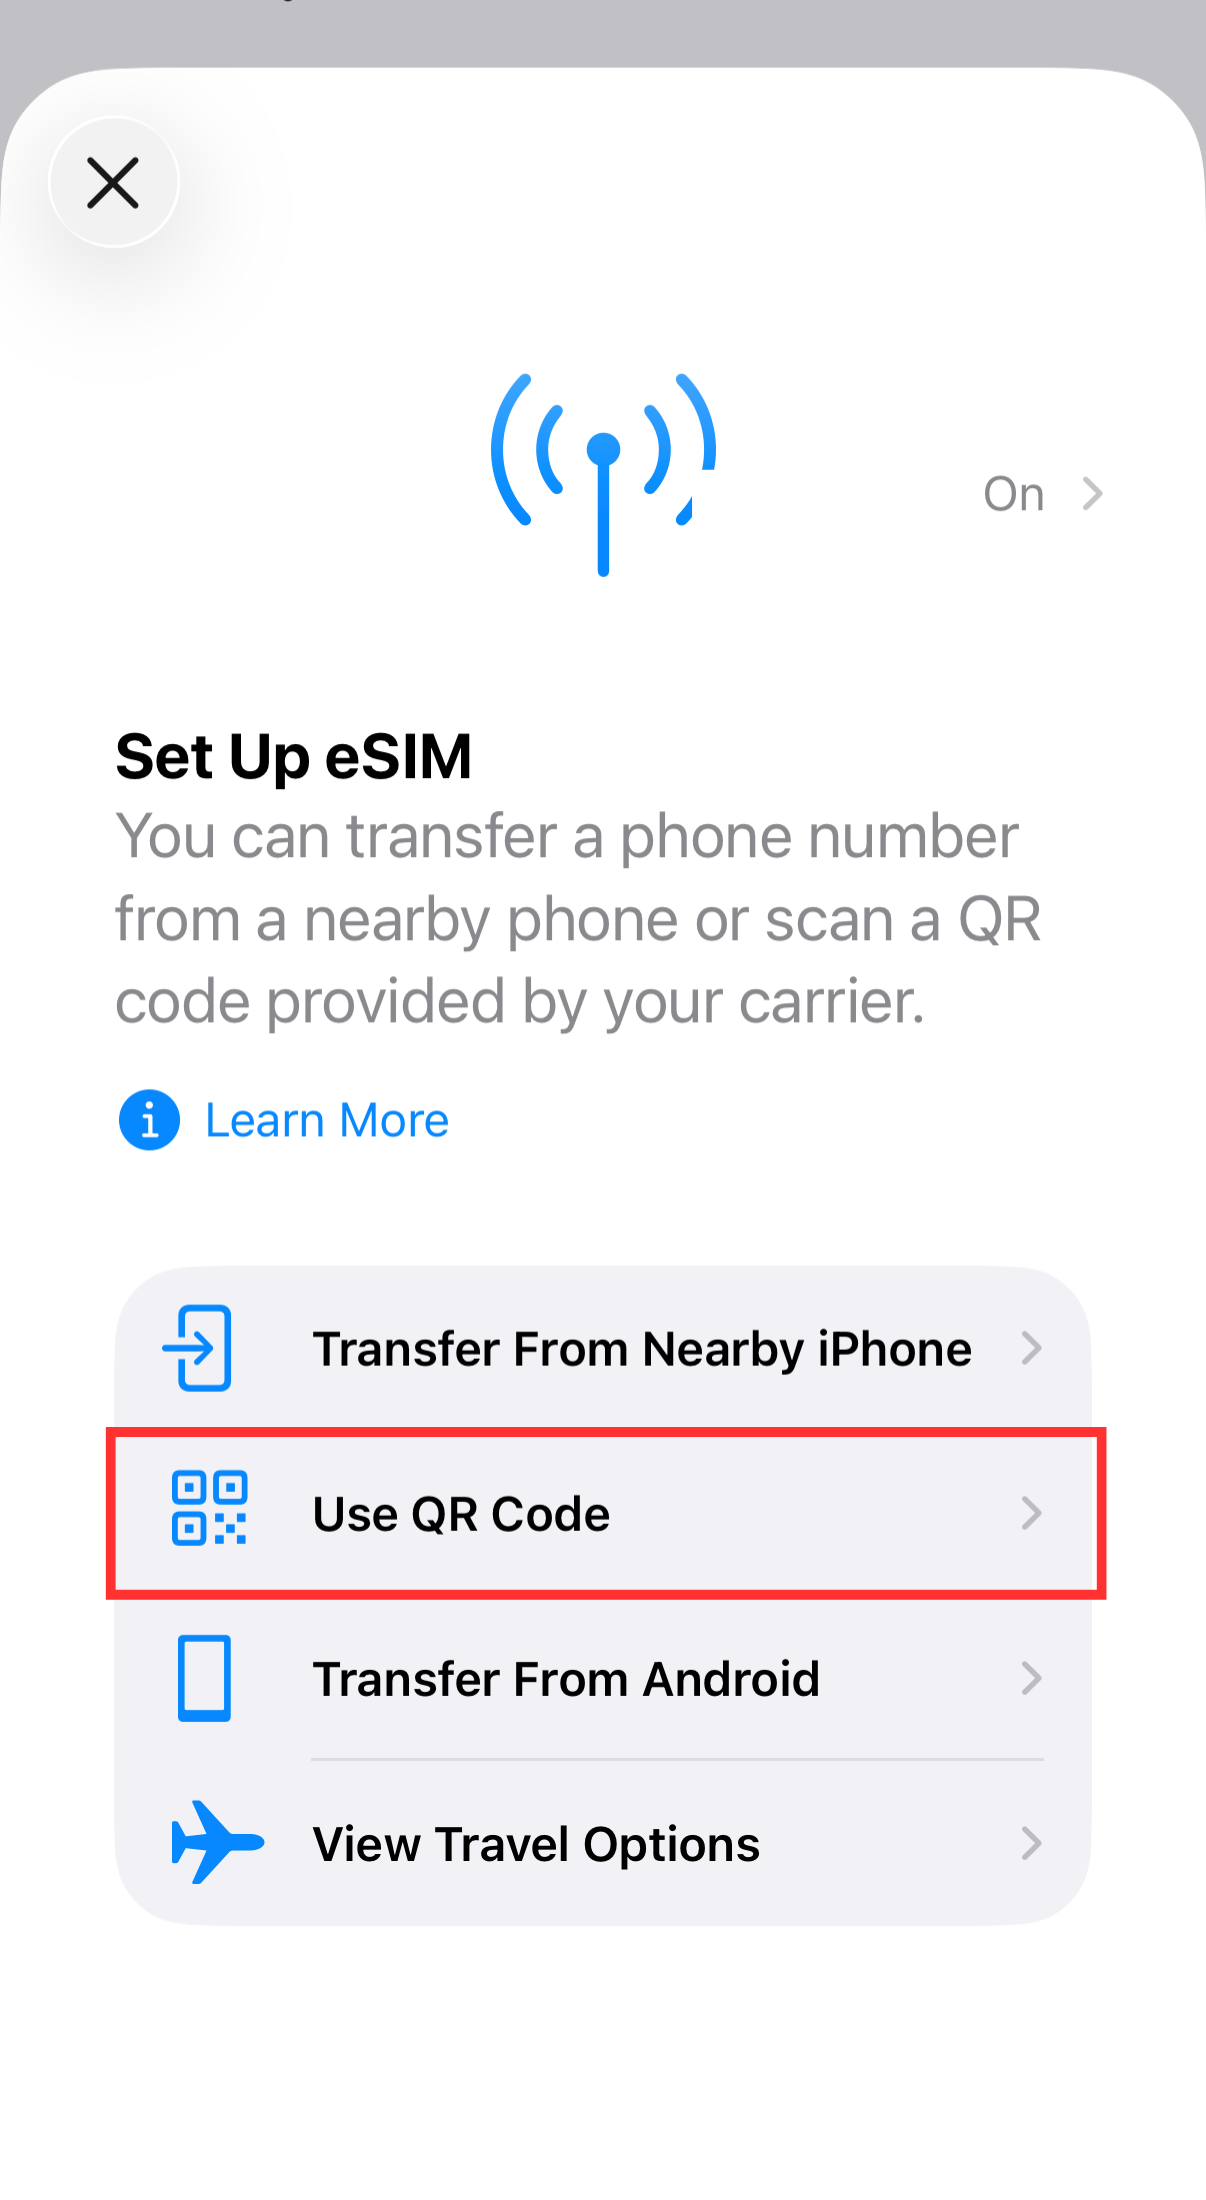
3. Tap [Use QR Code]
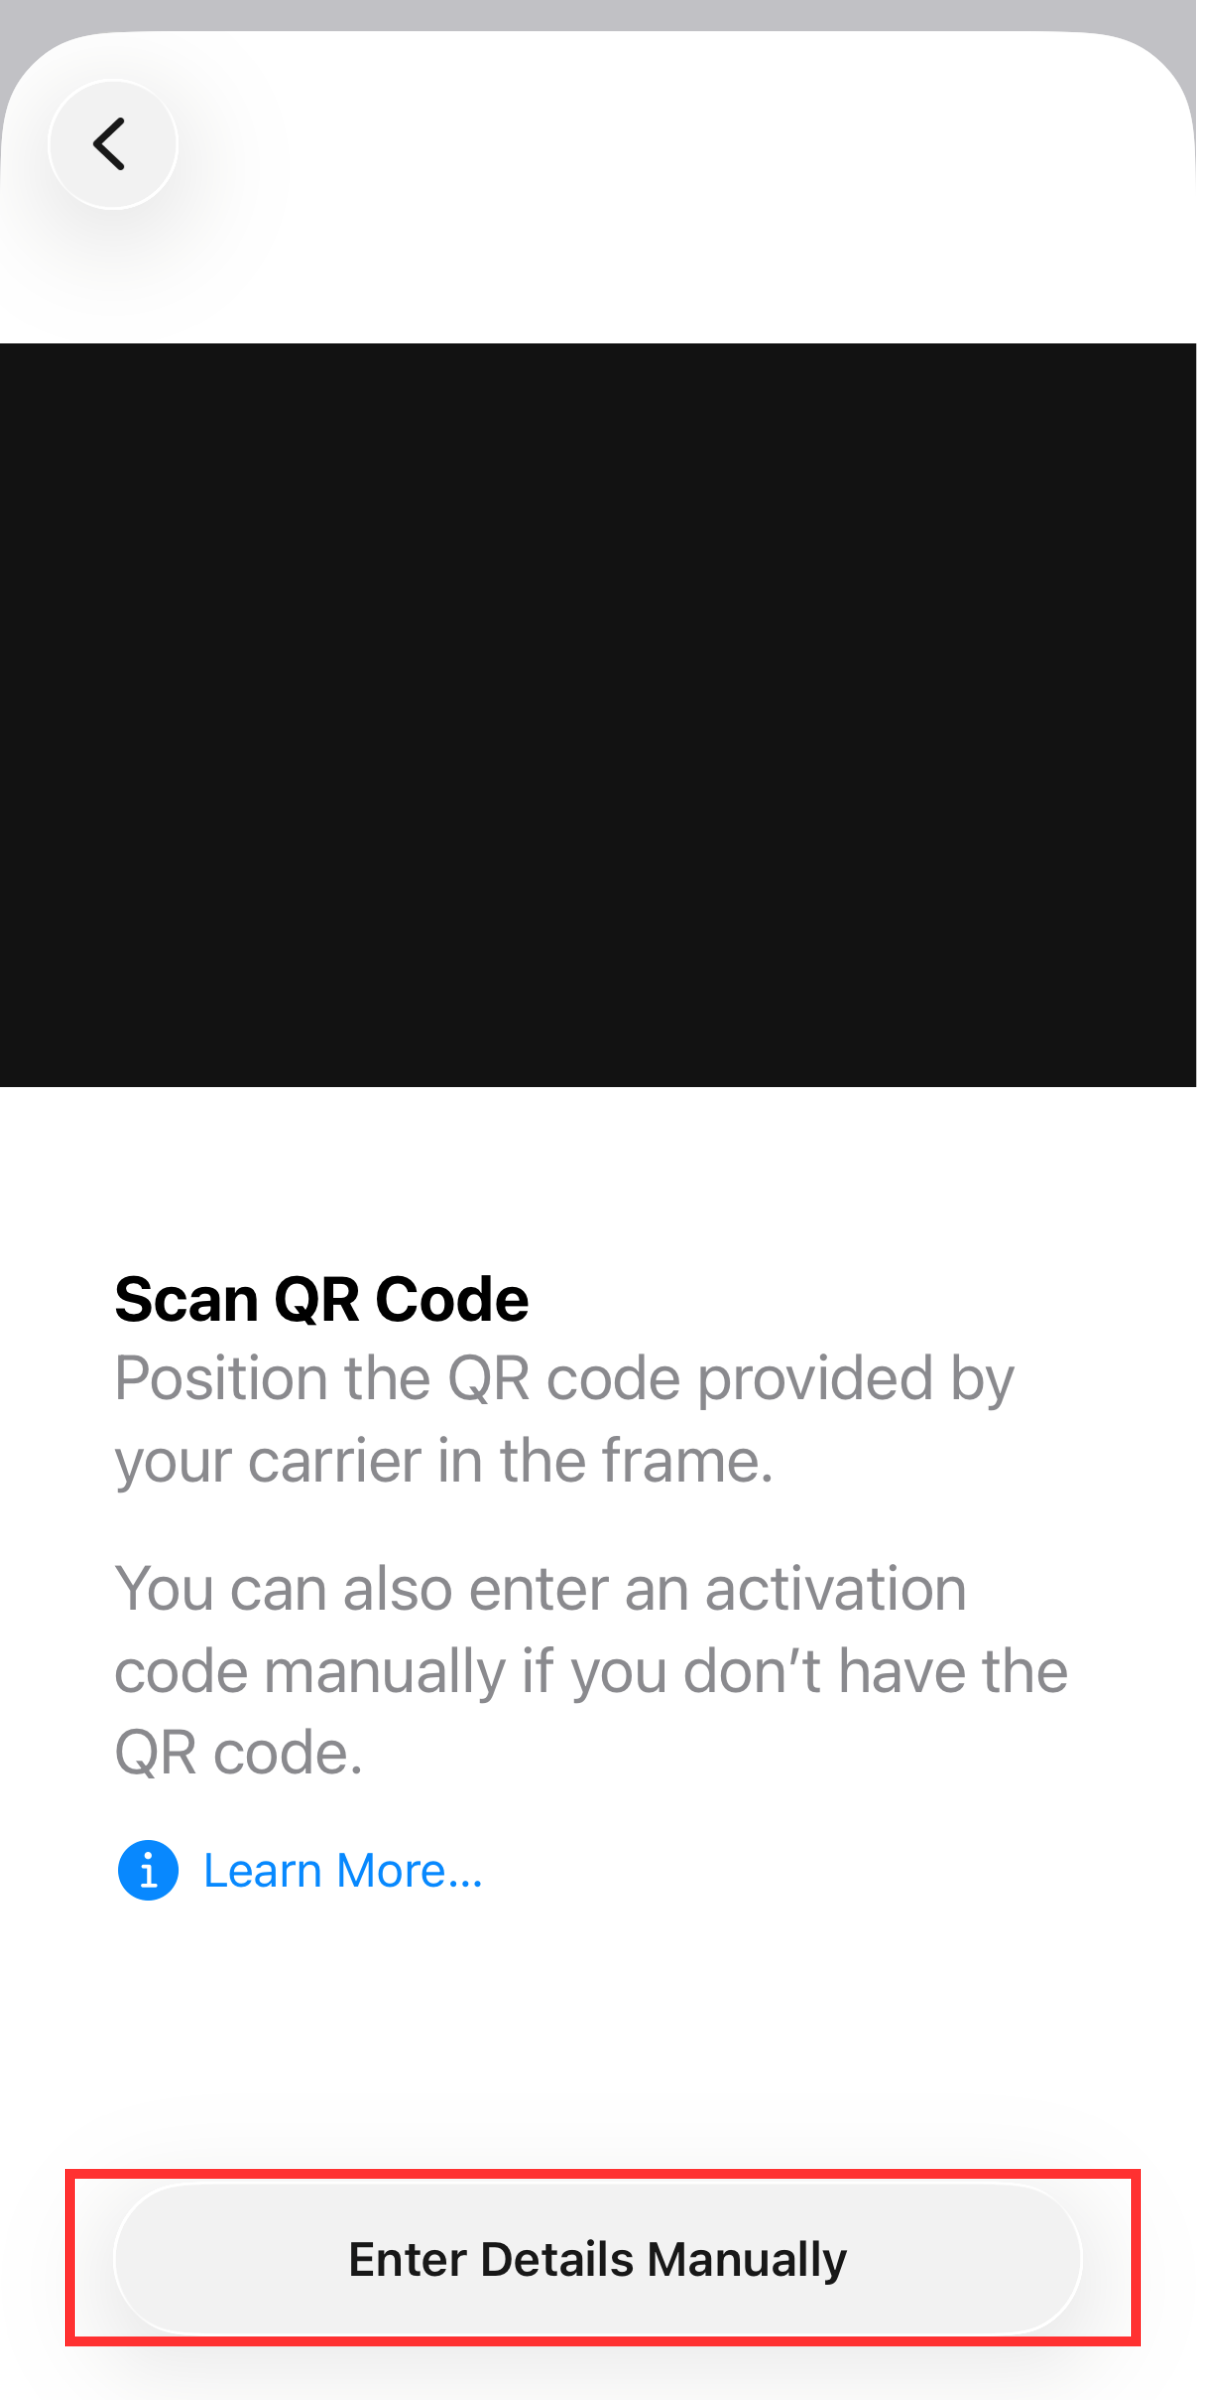
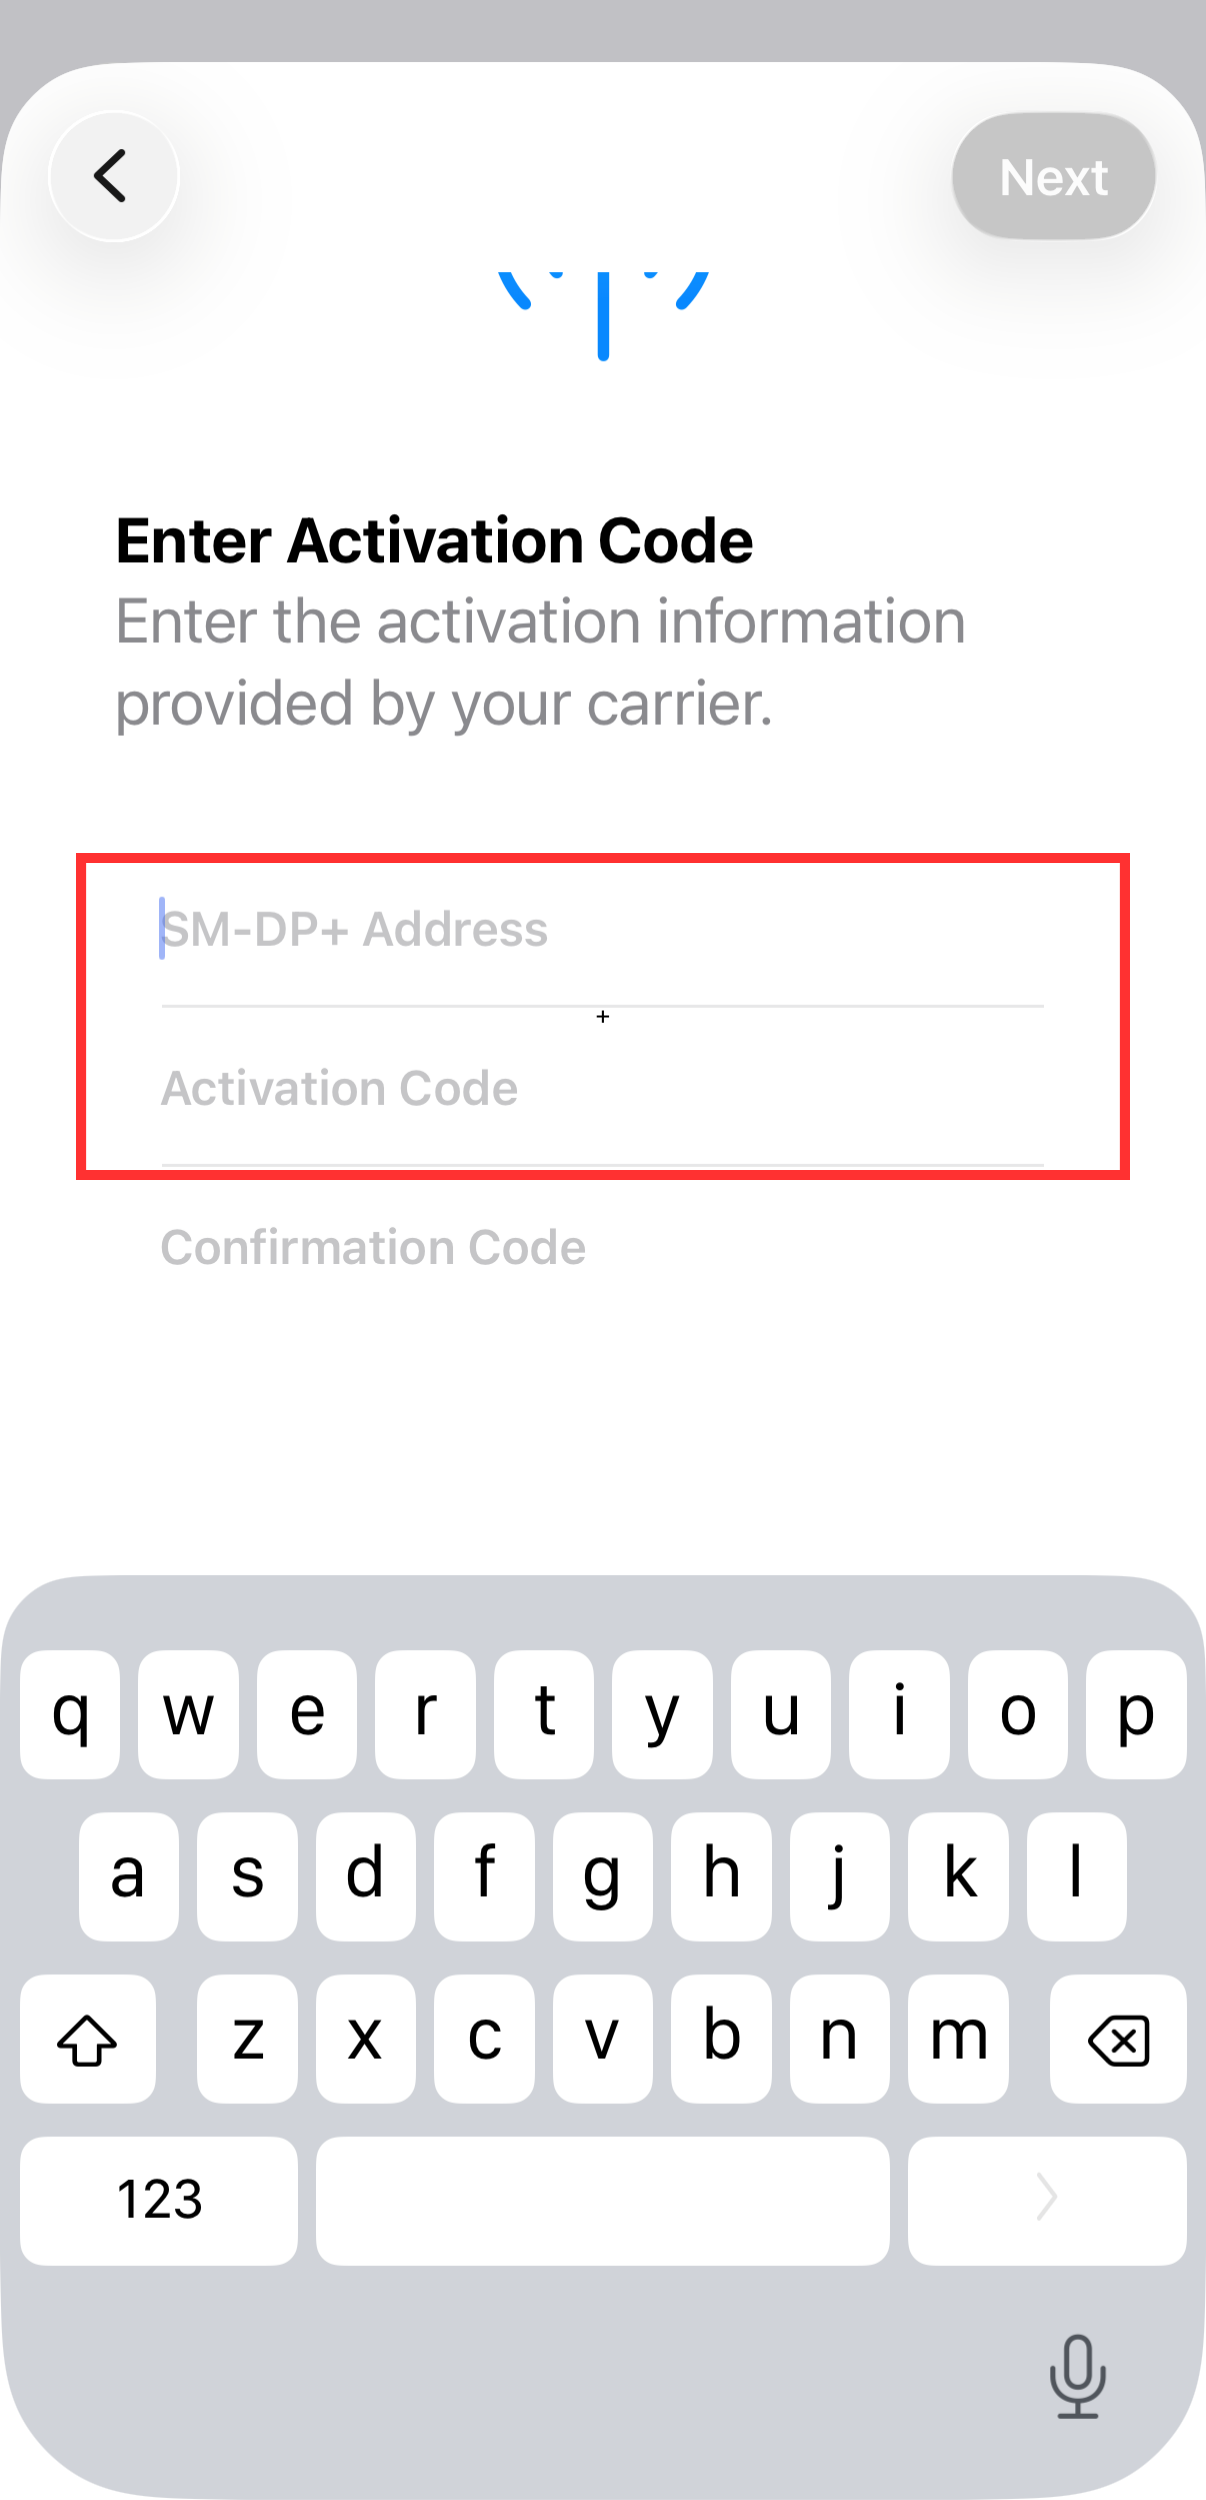
4. Scan the QR code, or tap [Enter Details Manually]
5. If you selected [Enter Details Manually], enter your activation details
*Your activation code has been sent to you via email.
================
• SM-DP+ Address
• Activation Code
*Confirmation code is not required.
================
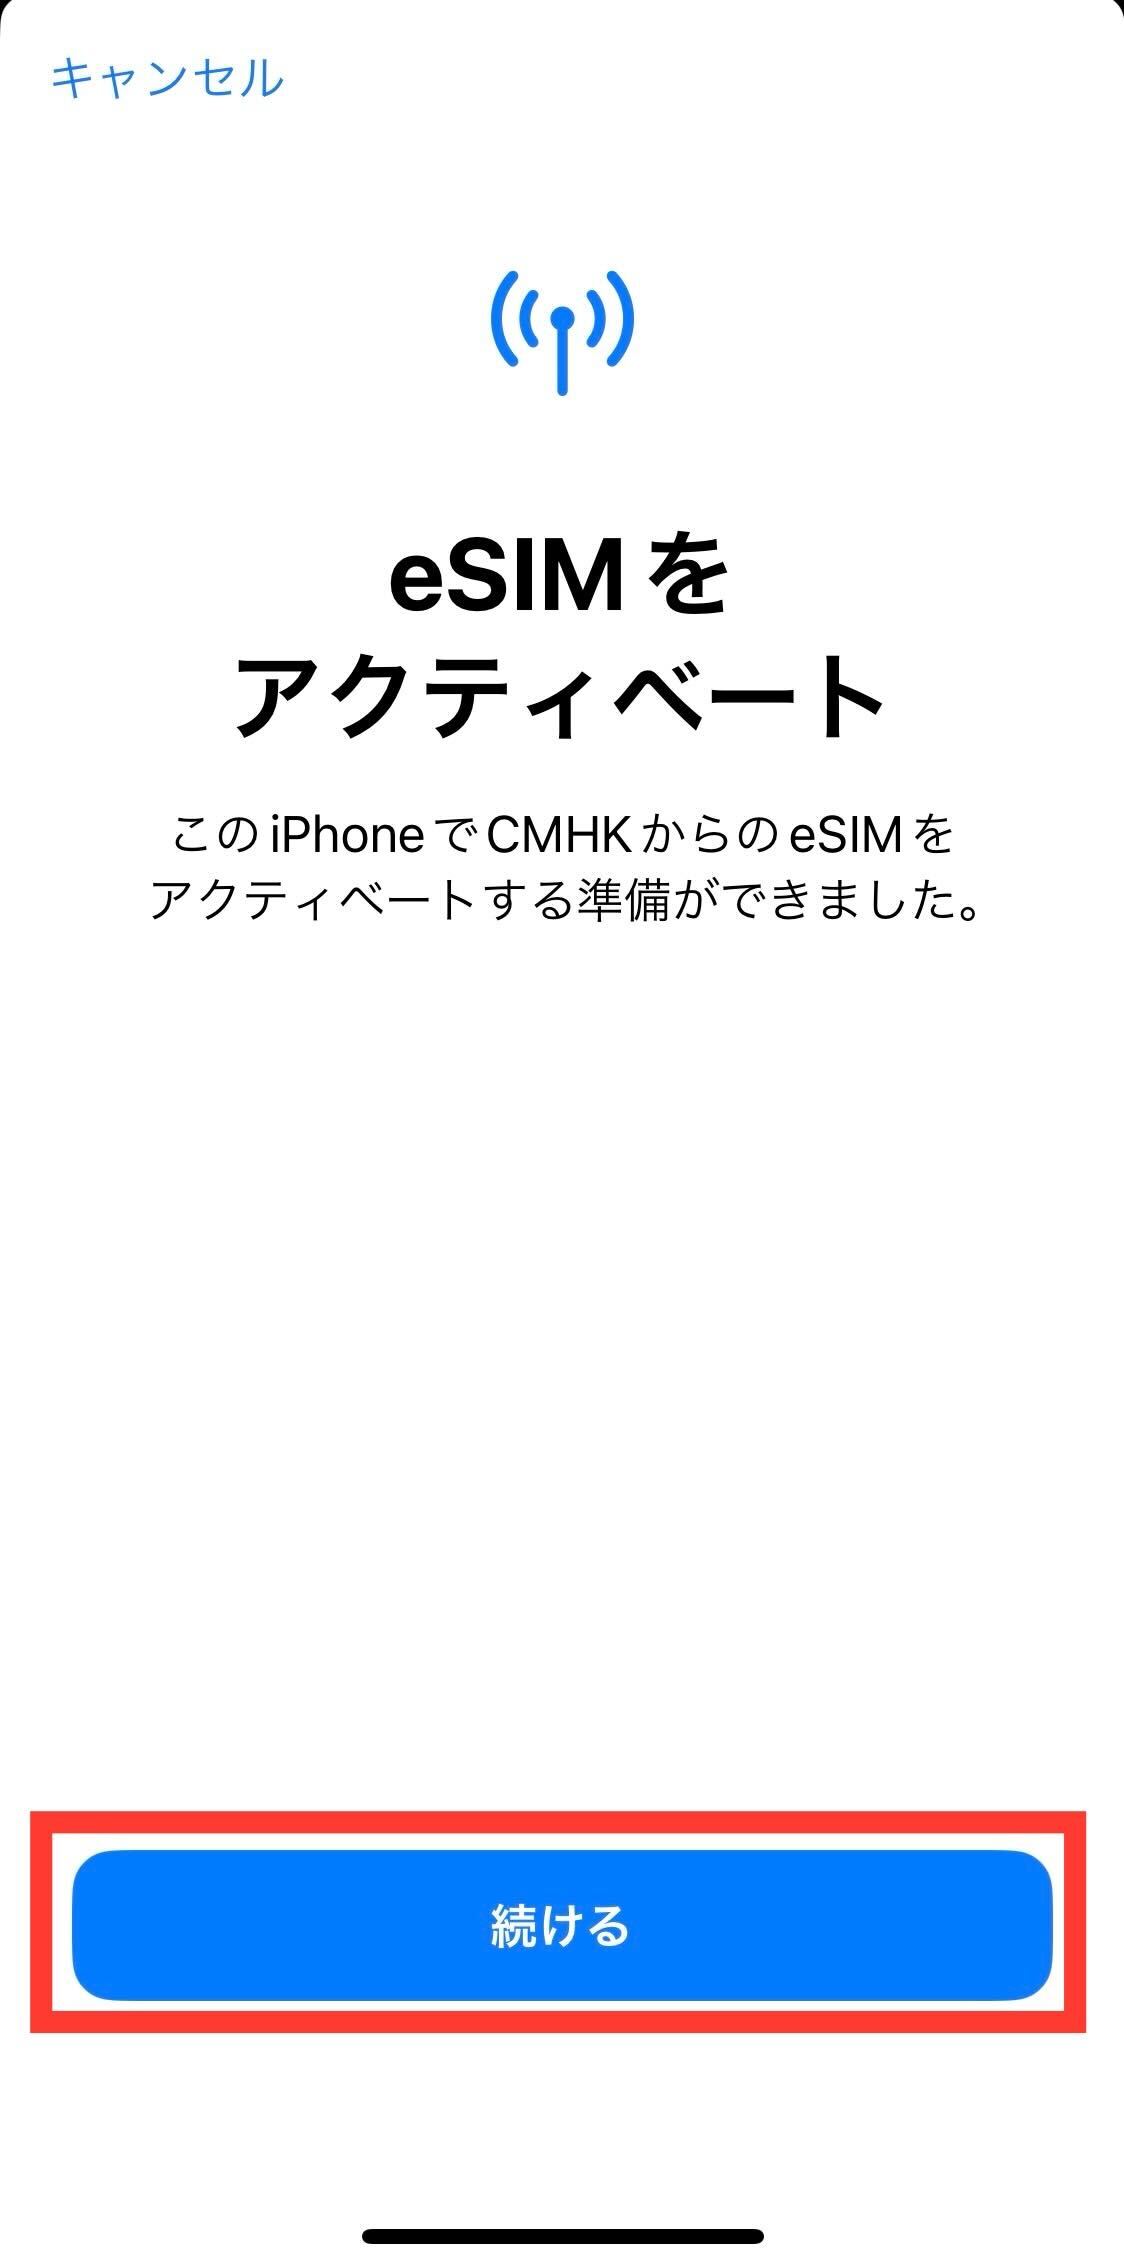
6. Tap [Continue] when "Activate eSIM" appears on the screen
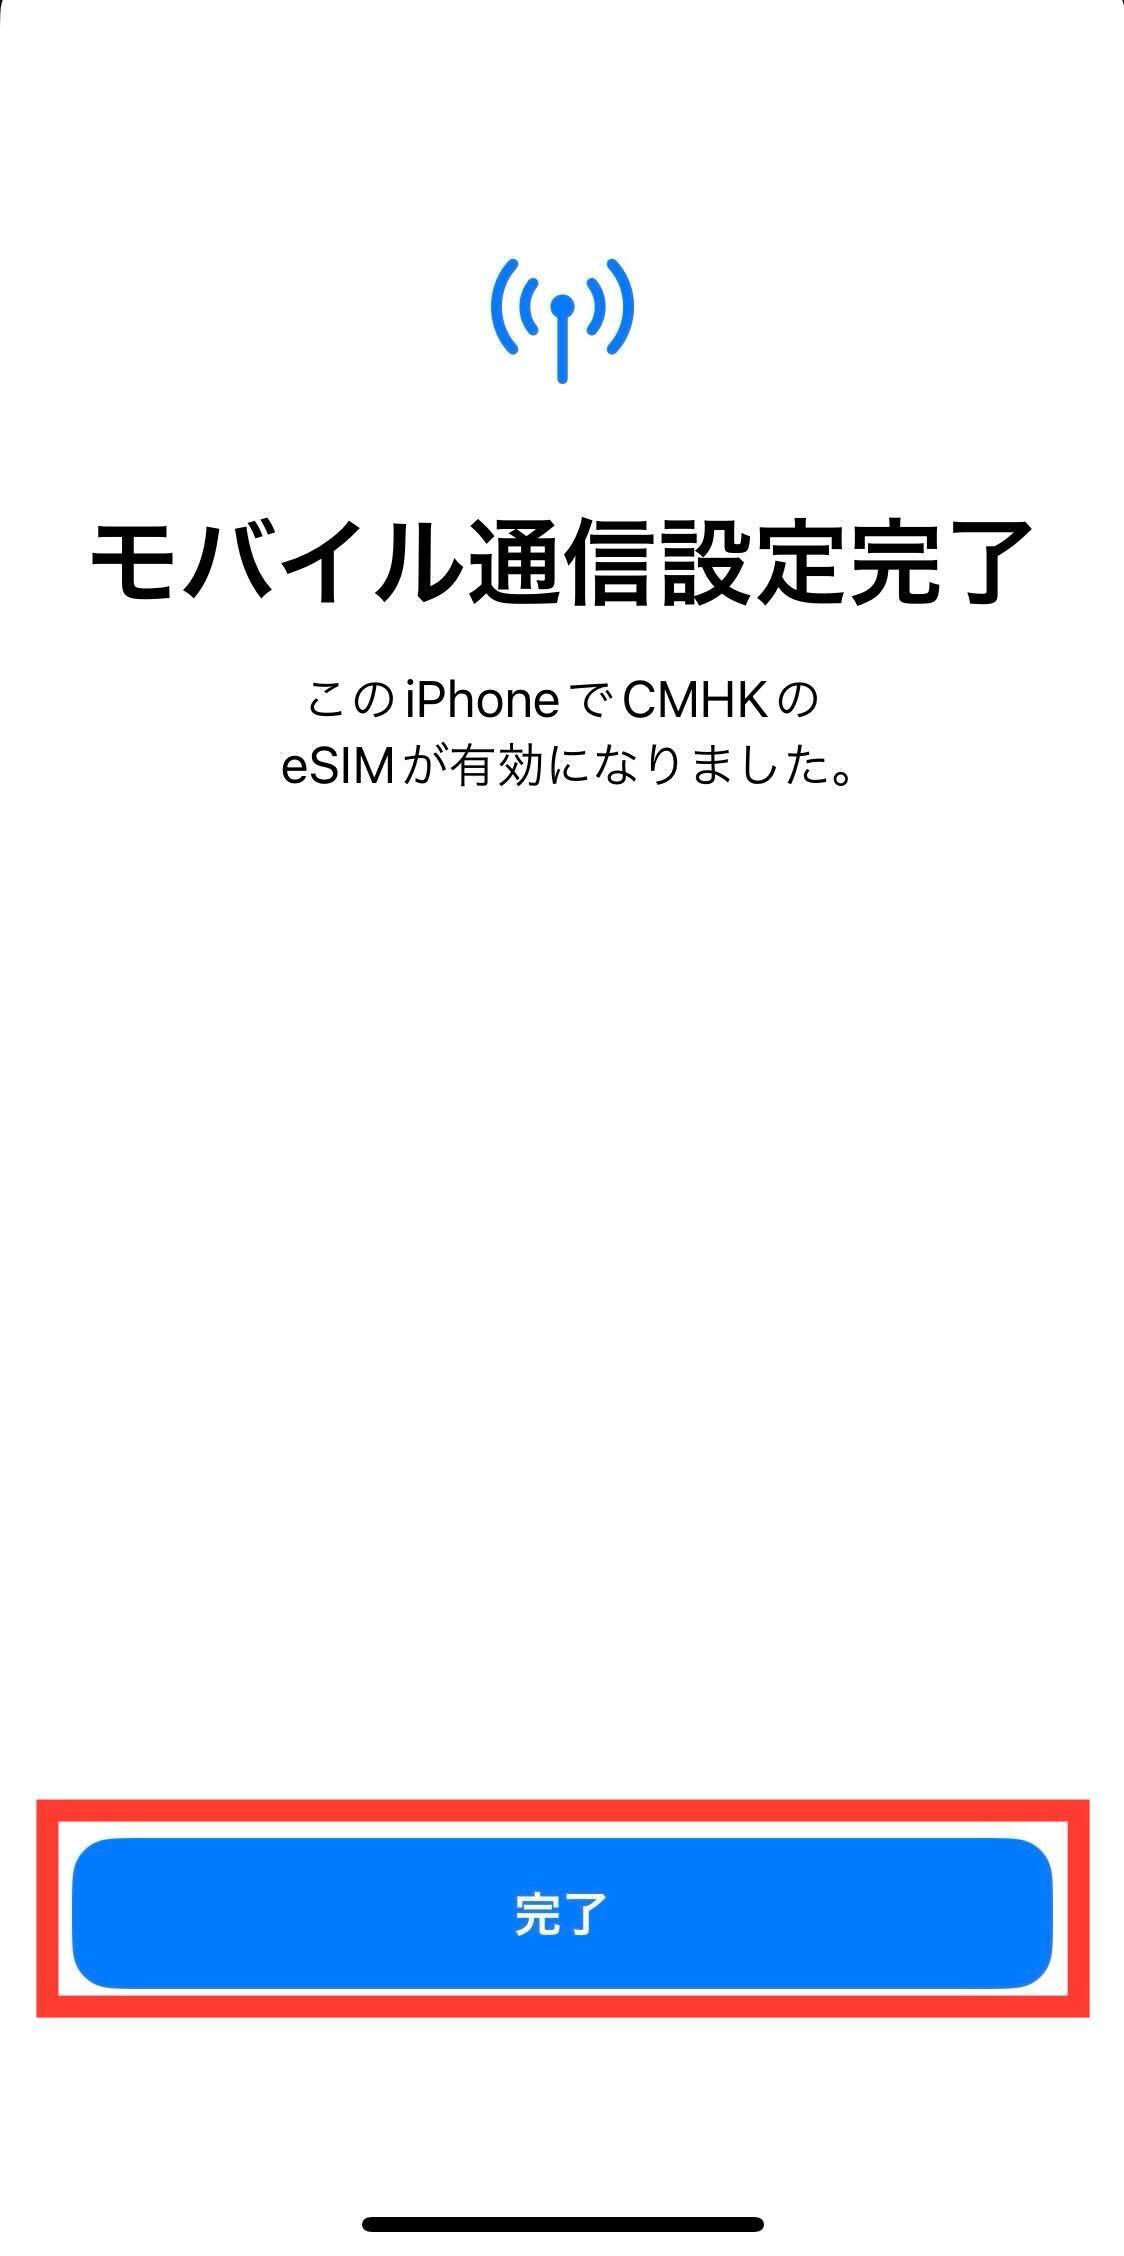
7. Tap [Done] when "Cellular Setup Complete" appears on the screen
8. Confirm that the eSIM has been added under Cellular, then turn [Data Roaming] ON
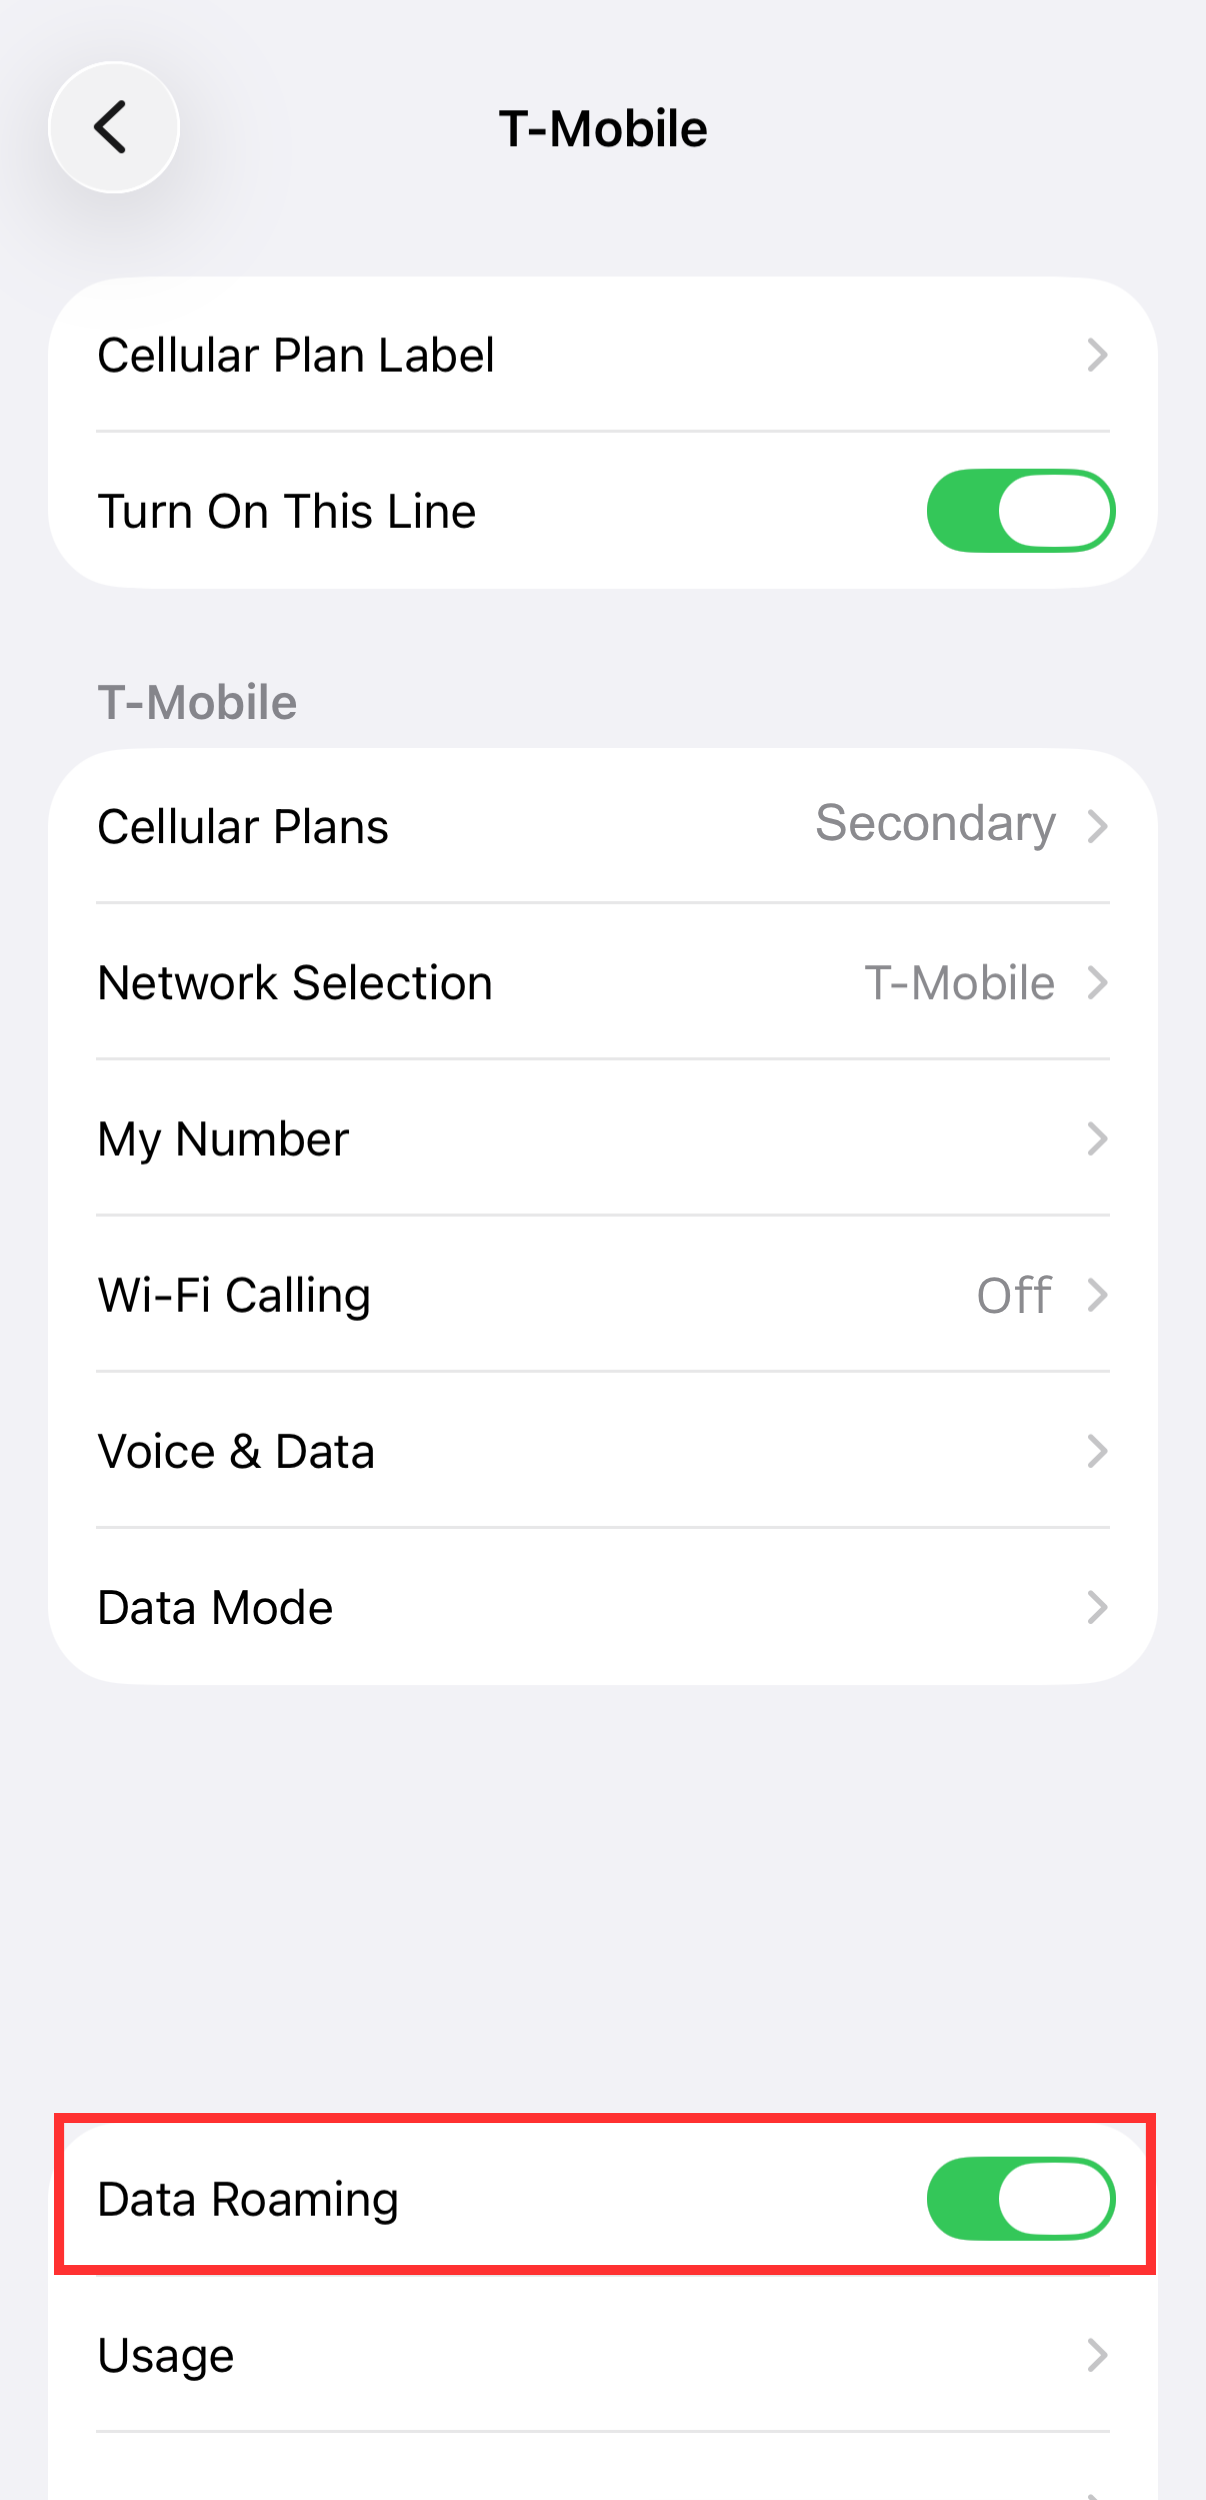
eSIM setup is now complete.
Please make sure you are connected to the Internet.
*If you are using an Android device and need to configure the APN settings, please set it up according to your destination country.
• Please start using the service in the covered country within 180 days of placing your order.
• The service period begins on the day your device connects to the network.
• The validity period includes the start date.
• Date network connected: July 1
• Service validity period: July 1 – July 7
• Voice calls and SMS are not supported.
• Once connected to the network, the service period cannot be paused or stopped.
Was this article helpful?
That’s Great!
Thank you for your feedback
Sorry! We couldn't be helpful
Thank you for your feedback
Feedback sent
We appreciate your effort and will try to fix the article